🚀Making Docker Containers Production-Ready
60 Days DevOps Challenge: Day 11
Initial Tasks:
✅ Task 1: Learn about multi-stage builds and why they are crucial for production.
✅ Task 2: Write a basic Dockerfile for a simple Python or Node.js app and analyze its size using:
docker images
✅ Task 4: Check Container logs using Docker logging:
docker logs <container_id>
By default, Docker logs everything in /var/lib/docker/containers/<container_id>/ as JSON
{
  "log-driver": "json-file",
  "log-opts": {
    "max-size": "10m",
    "max-file": "3"
  }
}
🔥 Challenge 1: Convert an existing Dockerfile into a multi-stage build and compare image sizes.
Why Multi-Stage Builds?
✅ Reduce image size
✅ Remove unnecessary build dependencies
✅ Optimize deployment
Step 1: Traditional Dockerfile (Without Multi-Stage)
FROM python:3.9
WORKDIR /app
COPY requirements.txt .
RUN pip install --no-cache-dir -r requirements.txt
COPY . .
EXPOSE 5000
CMD ["python", "app.py"]
echo "flask" > requirements.txt
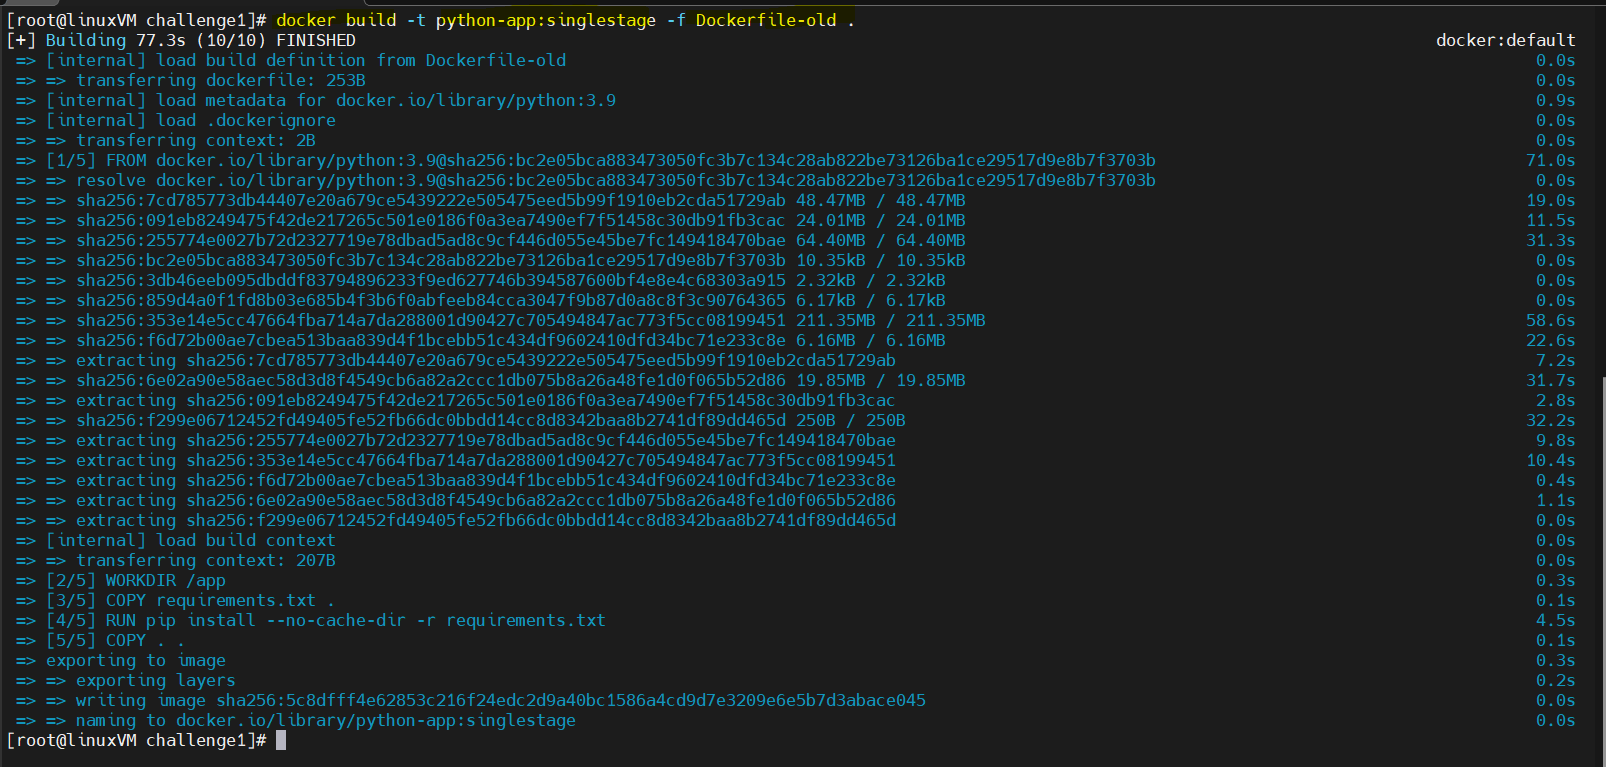
docker build -t python-app:singlestage -f Dockerfile-old .
👉 Image Size: ~1GB+
Step 2: Optimized Multi-Stage Build
# First stage - Builder
FROM python:3.9-slim AS builder
WORKDIR /app
COPY requirements.txt .
RUN pip install --upgrade pip  # Upgrade pip
RUN pip install --no-cache-dir --user -r requirements.txt  # Install dependencies

# Second stage - Final Image
FROM python:3.9-slim
WORKDIR /app
COPY --from=builder /root/.local /root/.local
COPY . .
ENV PATH="/root/.local/bin:$PATH"
EXPOSE 5000
CMD ["python", "app.py"]
echo "flask" > requirements.txt
👉 Image Size: ~100MB+
Step 3: Build & Compare Image Sizes
- Build the Multi-Stage Image
docker build --no-cache -t python-app:multistage .
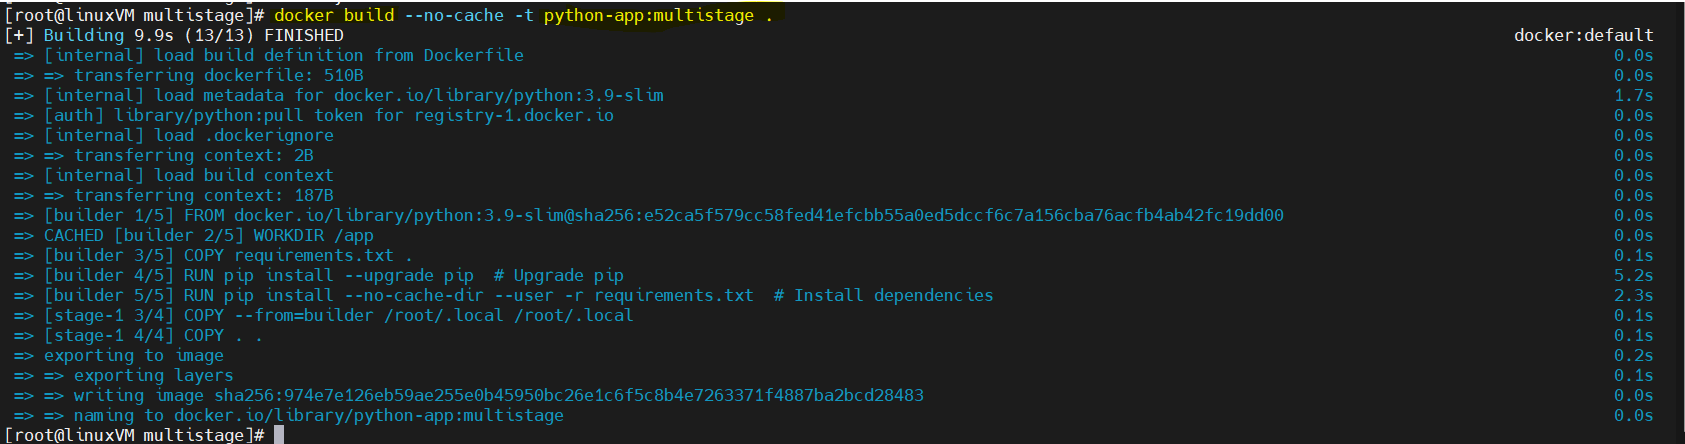
- Compare Image Sizes
docker images | grep "python-app"

✅ Outcome: Multi-stage build significantly reduces image size.
🔥 Challenge 2: Run a lightweight Alpine-based container (python:3.9-alpine or node:14-alpine).
Step 1: Modify Dockerfile
FROM python:3.9-alpine
WORKDIR /app
COPY requirements.txt .
RUN pip install --no-cache-dir -r requirements.txt
COPY . .
EXPOSE 5000
CMD ["python", "app.py"]
echo "flask" > requirements.txt
Step 2: Build and Compare
docker build -t python-app:alpine .
docker images | grep "python-app"
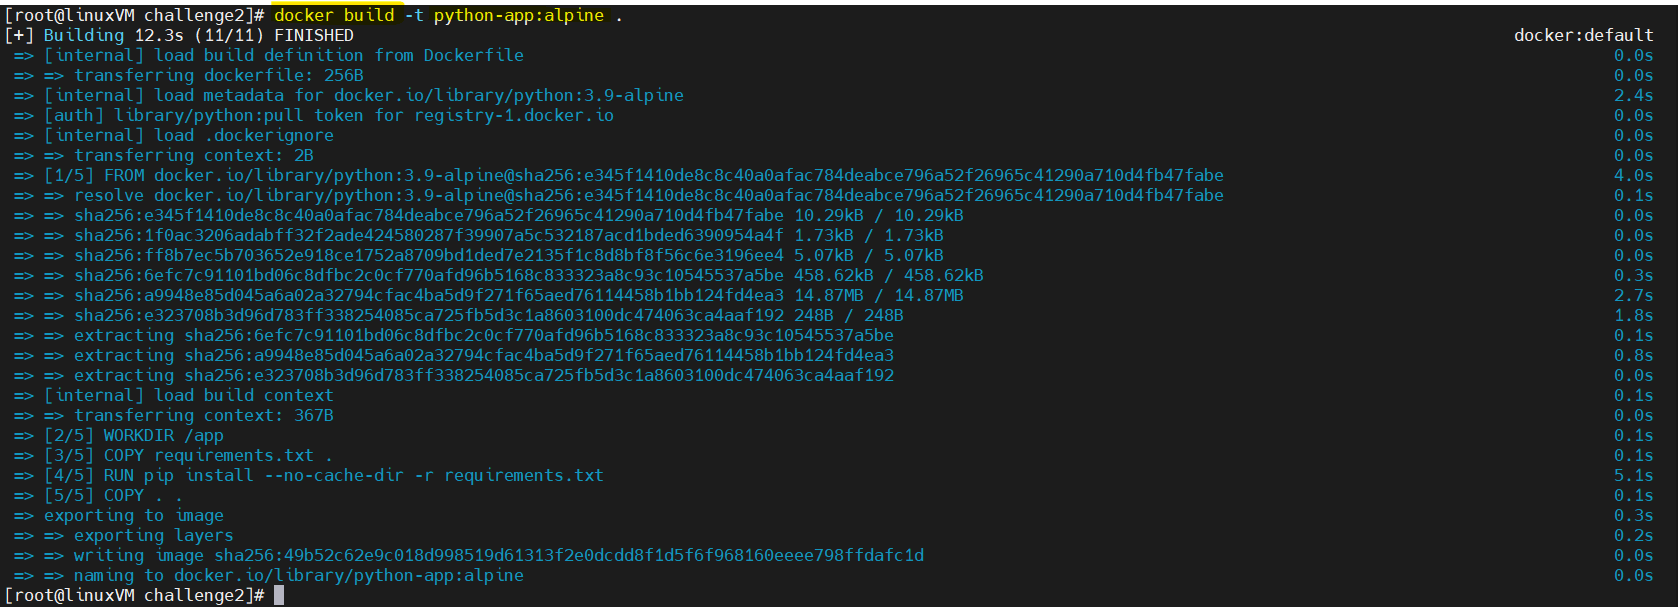

✅ Outcome: Reduces image size to ~50MB.
🔥 Challenge 3: Add a HEALTHCHECK in a Dockerfile for a web application (curl or wget).
Step 1: Modify Dockerfile
FROM python:3.9-alpine

WORKDIR /app

# Install curl for healthcheck
RUN apk add --no-cache curl

# Copy and install dependencies
COPY requirements.txt .
RUN pip install --no-cache-dir -r requirements.txt

# Copy application files
COPY . .

EXPOSE 5000

# Healthcheck for Flask app
HEALTHCHECK --interval=30s --timeout=10s --retries=3 \
  CMD curl --fail http://localhost:5000/ || exit 1

CMD ["python", "app.py"]
echo "flask" > requirements.txt
- Create a file named app.py
# app.py
from flask import Flask

app = Flask(__name__)

@app.route('/')
def home():
    return "Hello, Docker!"

if __name__ == '__main__':
    app.run(host='0.0.0.0', port=5000)
Step 2: Build and Run
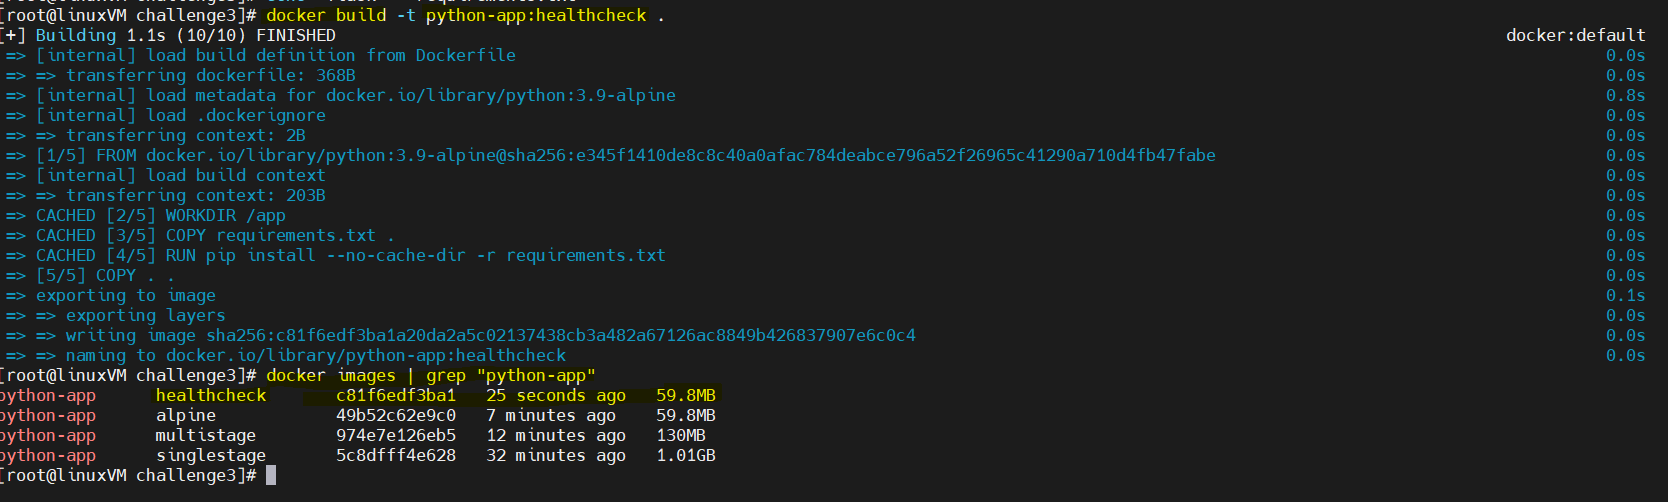
docker build -t python-app:healthcheck .
docker images | grep "python-app"
docker run -d --name python-app -p 5000:5000 python-app:healthcheck
docker ps
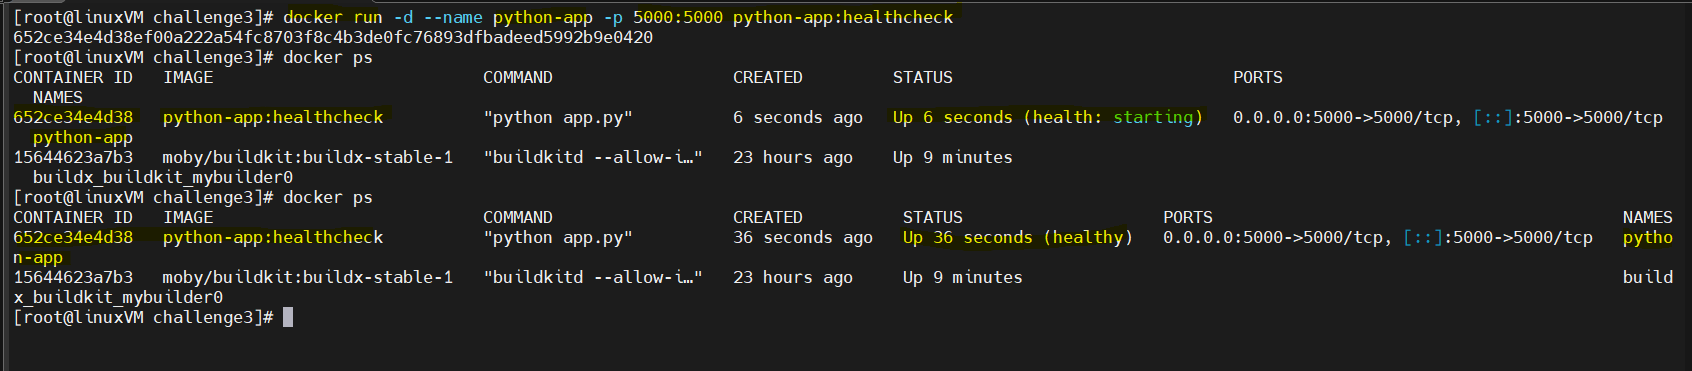
Step 3: Check Container Health
docker inspect <container_id> | grep -i health

Step 4: Check app running or not
curl -s http://localhost:5000

✅ Outcome: Docker continuously checks if the app is running correctly.
🔥 Challenge 4: Run a container without root privileges and ensure the app runs correctly.
Step 1: Modify Dockerfile
FROM python:3.9-alpine
WORKDIR /app
RUN addgroup -S appgroup && adduser -S appuser -G appgroup
USER appuser
COPY requirements.txt .
RUN pip install --no-cache-dir -r requirements.txt
COPY . .
EXPOSE 6000
CMD ["python", "app.py"]
echo "flask" > requirements.txt
- Create a file named app.py
# app.py
from flask import Flask

app = Flask(__name__)

@app.route('/')
def home():
    return "Hello, Docker! Running without root"

if __name__ == '__main__':
    app.run(host='0.0.0.0', port=6000)
Step2: Build and Run
docker build -t python-app:nonroot .
docker run -d --name python-appuser -p 6000:6000 python-app:nonroot
docker ps


Step 3: Checkout app
curl -s http://localhost:6000

✅ Outcome: The container runs without root privileges, improving security.
🔥 Challenge 5: Scan your Docker image using docker scan or Trivy, and fix vulnerabilities.
Step 1: Scan the Image Using Trivy (More Detailed)
- Install Trivy:
rpm -ivh https://github.com/aquasecurity/trivy/releases/download/v0.61.0/trivy_0.61.0_Linux-64bit.rpm

- Run the security scan
trivy image python-app:nonroot

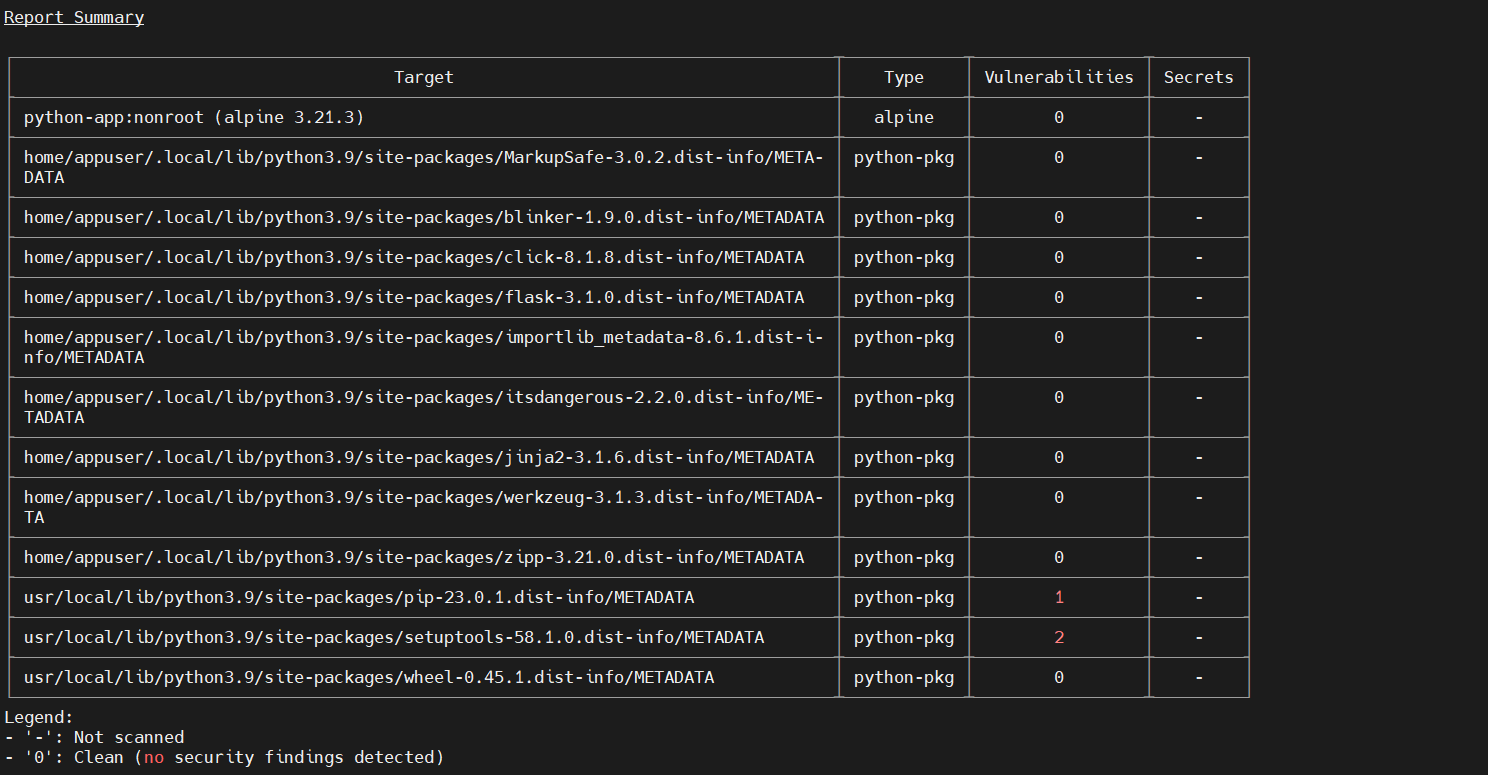
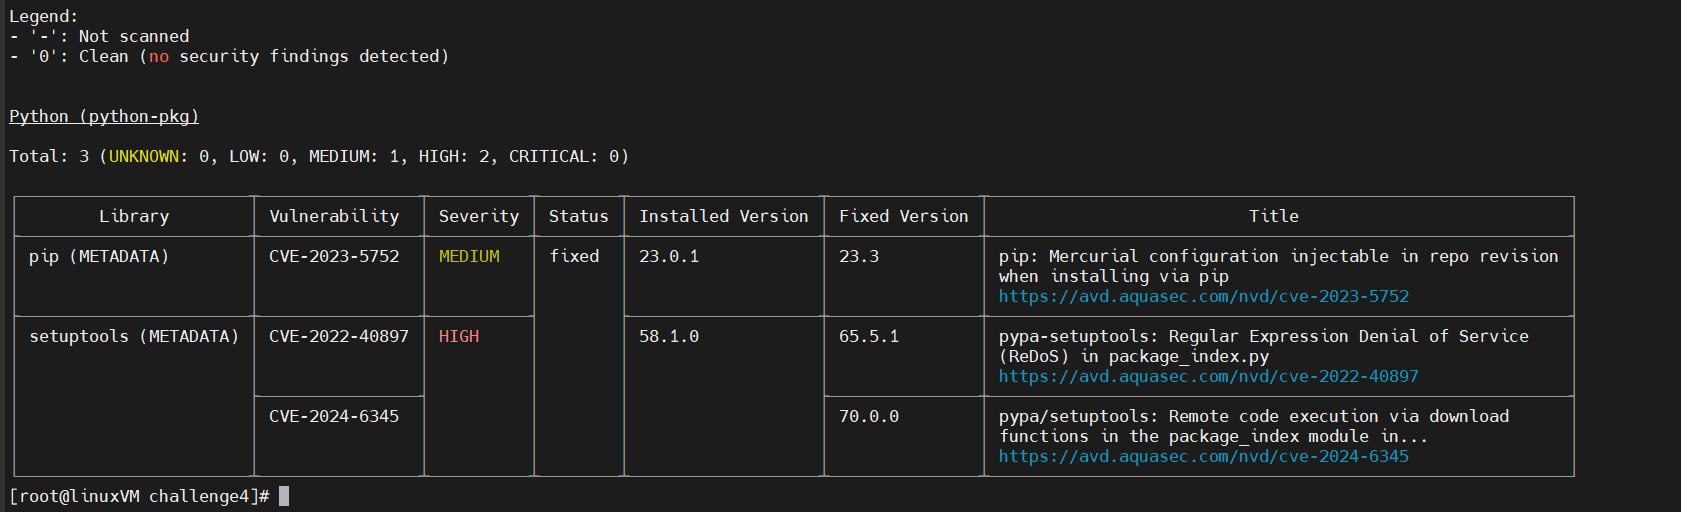
✅ Outcome: Use an updated base image and remove unnecessary dependencies.
🔥 Challenge 6: Implement log management by redirecting container logs to a file.
Step 1: Modify Docker Daemon Config (/etc/docker/daemon.json)
{
  "log-driver": "json-file",
  "log-opts": {
    "max-size": "10m",
    "max-file": "3"
  }
}
systemctl daemon-reload
sudo systemctl restart docker
Step 2: Redirect Logs to a File
docker run -d --name python-app2\
  --log-driver=json-file \
  --log-opt max-size=10m --log-opt max-file=3 \
  python-app:nonroot
docker ps -a

Use Docker's Default Log File Location
- Docker logs are stored by default in:
cat /var/lib/docker/containers/<container_id>/<container_id>-json.log

✅ Outcome: Logs are now stored efficiently with rotation.
🔥 Challenge 7: Set up resource limits (memory, CPU) for a container using --memory and --cpus.
Step 1: Run the Container with CPU & Memory Limits
- You can limit memory and CPU usage using:
docker run -d --name python-app3 \
  --memory=256m --cpus=0.5 \
  python-app:nonroot
docker ps
Explanation of Flags
--memory="256m" → Limits the container to 256MB of RAM.
--cpus="0.5" → Restricts the container to 50% of a single CPU core.

Step 2: Verify Resource Limits
- Check Container Stats in Real-Time
docker stats python-app3

- Inspect the Container’s Resource Settings
docker inspect python-app3 | grep -i '"memory"\|"cpu"'

✅ Outcome: Prevents excessive resource consumption.
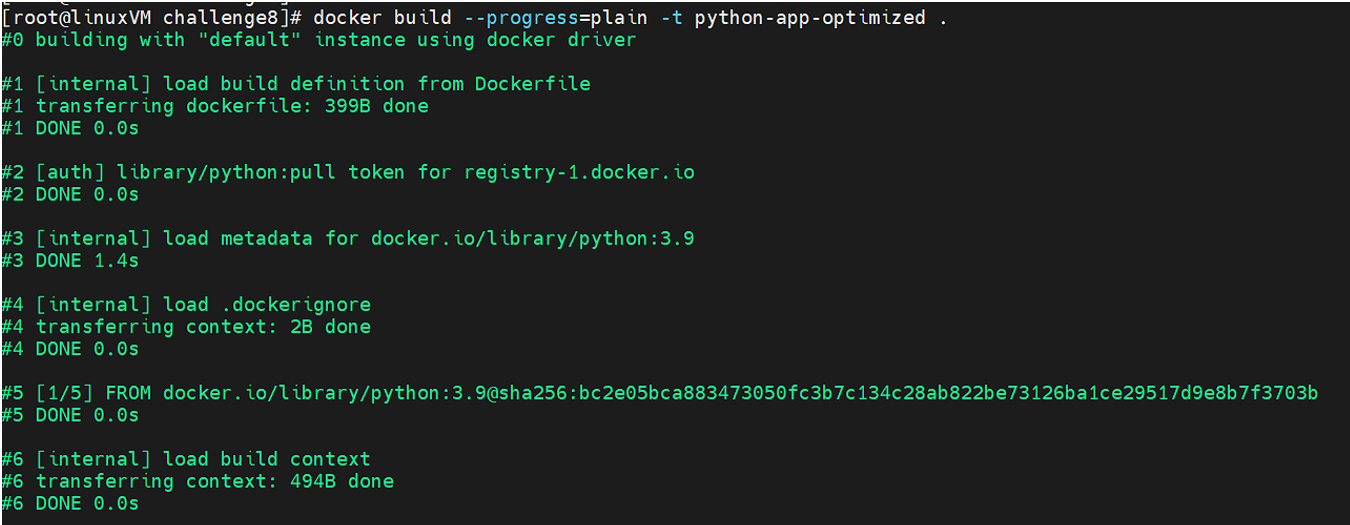
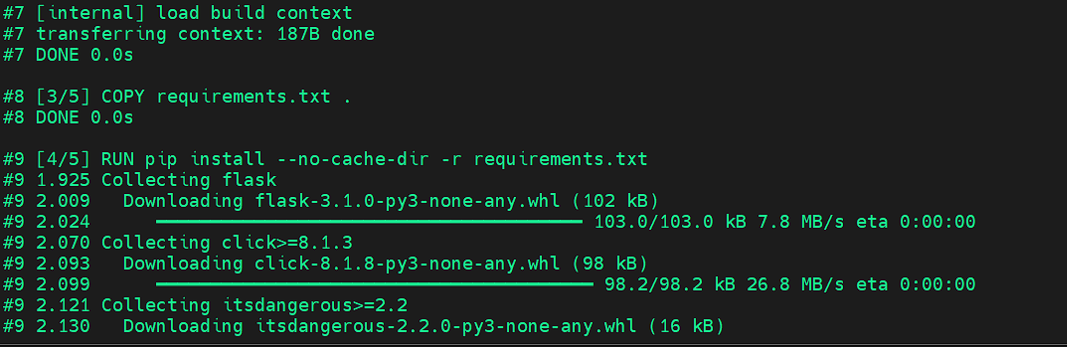
🔥 Challenge 8: Use docker build --progress=plain to analyze layer caching and optimize the build process.
Step 1: Modify Your Dockerfile for Layer Optimization
FROM python:3.9
WORKDIR /app
# Copy only requirements first (Optimizes caching)
COPY requirements.txt .
# Install dependencies first (Ensures better caching)
RUN pip install --no-cache-dir -r requirements.txt
# Now copy the rest of the application files
COPY . .
EXPOSE 5000
CMD ["python", "app.py"]
echo "flask" > requirements.txt
Step 2: Build the Docker Image with Plain Progress Output
- Run the build command with --progress=plain to analyze the build process:
docker build --progress=plain -t python-app-optimized .
This copies all files early, causing the dependency installation to run every time.
This reuses cached layers, making the build significantly faster when only app files change.

Step 3: Rebuild and Compare Build Times
- Rebuilding the image:
docker build --progress=plain -t python-app-optimized .
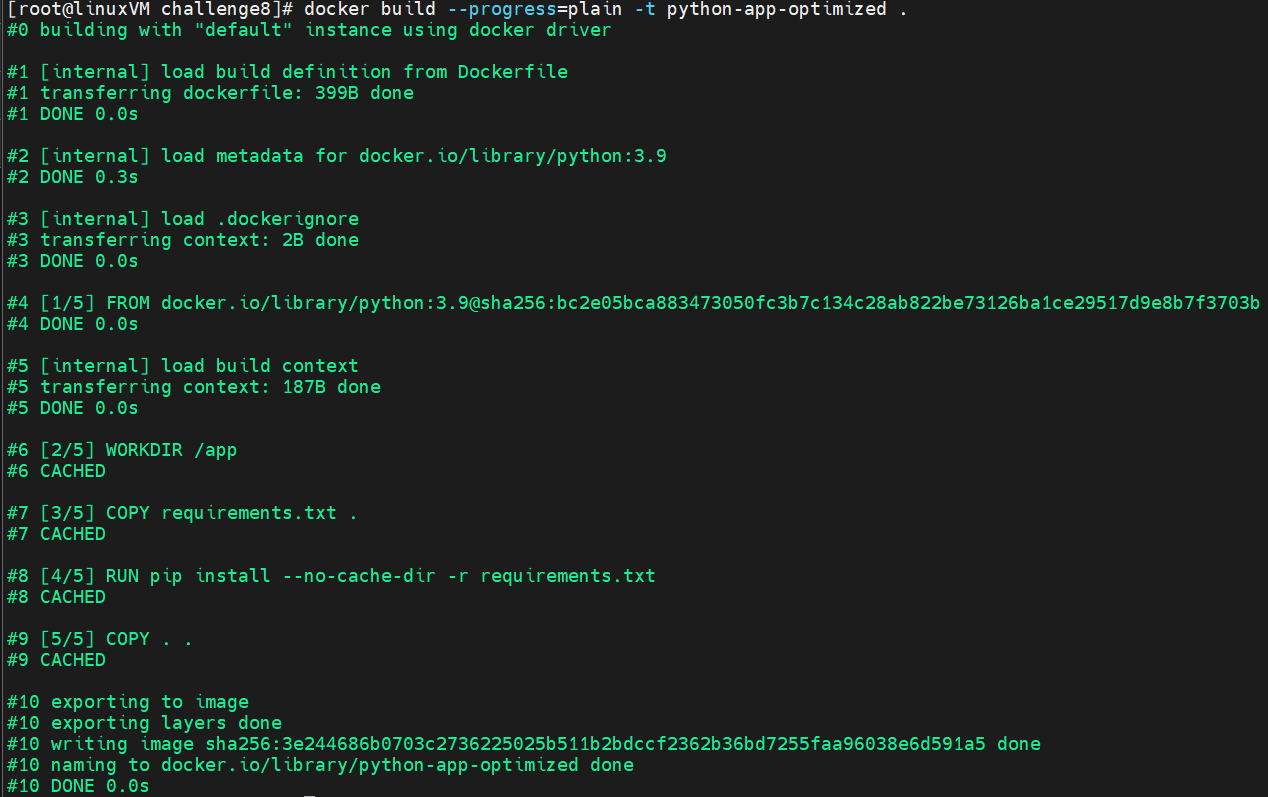
Note: The dependency installation step (pip install) should be skipped because it uses layer caching.
✅ Outcome: Dependencies rarely change, so they remain cached, speeding up builds.